Weddings are sometimes once-in-a-lifetime affairs that require utmost care and meticulousness. From the planning to the execution of the wedding plans, every little detail needs to be perfect. And this level of thoroughness encompasses even the wedding portrait retouching and editing that typically follows pre- or post-wedding photoshoots.
If you’re a wedding photographer or you’ve been tasked with editing wedding portraits to get that clean and pristine look for the bride or groom, then you’re probably wondering where to start. To help you navigate wedding portrait editing and retouching, we’ve created a step-by-step guide that you can follow.
1. Pinpoint the problem areas in the wedding portrait that will need retouching

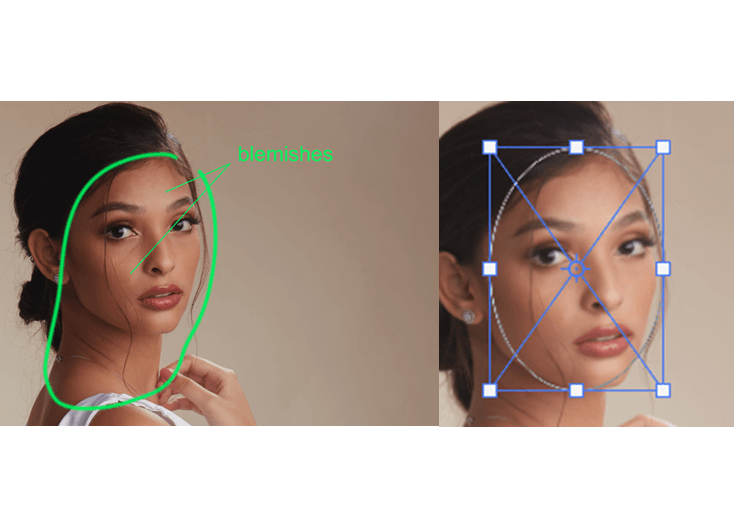
To start, let’s look at this example of a bridal fashion model. From the get-go, we can see various imperfections in the photo. Unfortunately, these photo imperfections are inevitable. While professional photographers may direct the bride, some things can only be corrected during the retouching phase.
In this photo, the obvious factors that will need correcting include the dark color, clothing wrinkles, facial blemishes, and uneven arm shape and skin tone. The good news is that these can all be corrected through the help of Adobe Photoshop and a few plug-ins.
2. Clear up facial blemishes and uneven skin tone
After pinpointing the problem areas for your wedding portrait retouching, it’s best to start by correcting blemishes and skin tone mismatches on the bride or groom’s face. You can easily do this with Photoshop’s clone stamp, healing brush, and spot healing brush.
For the easier route, using the spot healing brush allows you to correct blemishes automatically by simply cloning the closest spot of skin that resembles the color of the surrounding area.
To start, open your image in Adobe Photoshop. Create a new transparent layer on top of your image. Select the spot healing brush and navigate toward the Options bar. Tick off the option that allows the brush to sample all layers and choose “Content-aware” for a more intelligent spot-clearing capability. Zoom in on the photo and slowly go through all the blemishes you want to erase.
3. Correct uneven arms and body shapes
The next step is to correct any uneven arm shape or slim down a few parts for a smoother and more even model shape. You can do this by using Photoshops’ liquify tool. After finalizing your blemish edits in your wedding portrait, create another transparent layer on top of your picture.
Choose the liquify option under the filter menu and adjust your brush size according to the image. Choose forward warp in the options. Click on the edges of the body part you’re planning to slim down and slowly pull the brush inwards until it’s slimmed down according to your preferences.
Thanks to the versatility of the liquify tool, you can also use it to correct loose clothes and remove folds and wrinkles in your wedding portrait’s subject. Correct wrinkles and folds on fabric by simply adjusting edges and experimenting with the different liquifying settings.

4. lean up the subject’s edges and remove any other imperfections
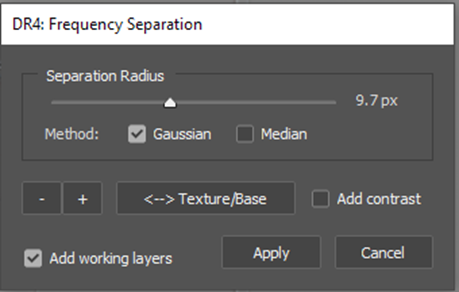
Aside from the liquify tool, you may also use Photoshop’s frequency separation – a technique that allows editors to separate an image’s texture from the image. This is especially useful if you’re facing the dilemma of having too many dress wrinkles.
To use this, create two duplicates of your original wedding portrait layer. Hide the top copy and select the second later. Blur out the second layer using the Gaussian Blur option until you can barely see the wrinkles on the fabric.
Make the top layer visible again, and select your middle layer again. Adjust the levels until you have 100% for opacity, 128 for offset, and 2 for scale. After, head over to the top layer, and set the blend mode to linear light to successfully remove the dress wrinkles you’re probably dreading.
5. Retouch your wedding portrait’s color levels and brightness
Last but not least, it’s time to correct your wedding portrait’s hues and retouch the image for better lighting and vibrance. You can do this by simply working around the image’s curves and levels. Adjust the image’s brightness, contrast, hue, sharpness, etc., until you get just the right natural look for your bride.

Before and After Wedding Portrait Retouching

If you follow all the steps in our wedding portrait retouching guide, your image will look similar to this. Notice how our final product has a brighter look that can make the photo’s subject look more vibrant. Surely, this portrait will become an important family keepsake after the wedding. If you’d like your photos edited, please reach out to us, and we’ll get in touch right away immediately. Email us at [email protected] to find out more.